
Overview
Outbound Links allow firm users to securely send documents and sensitive information to clients.
Use an Outbound Link when information needs to go from your firm to the client. Common examples may include:
- Sensitive documents
- Reports
- Credentials
- Other confidential information
An Outbound communication generates a separate secure link for each recipient to receive private and sensitive information from the firm.
Quick Links
- Create an Outbound Link
- Manage Outbound Links
- Common Uses for Outbound Links
- FAQs
Create an Outbound Link
The Outbound page allows you to create secure communications for sending information to clients.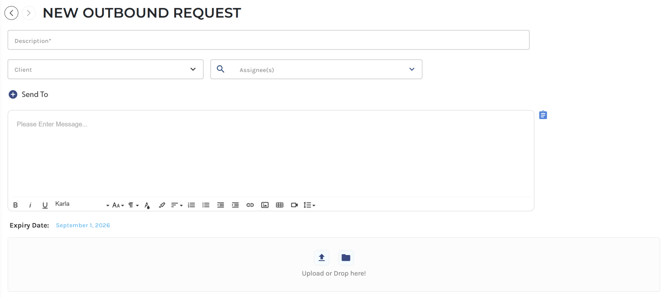 To create an outbound link:
- Navigate to the Outbound module by following this path: Conversations > External Conversations > Outbound.
- Click the Blue Plus (+) Sign.
- Complete the required information.
- Upload the applicable files.
- Configure the recipient and security settings.
- Click Next.
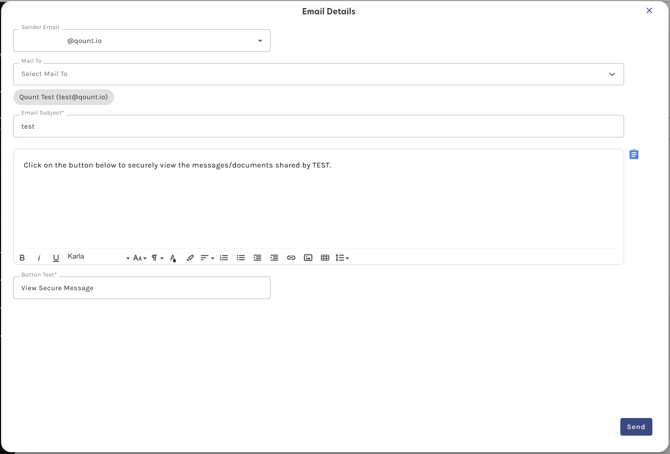
- Complete the email information.
- Send the Outbound communication.
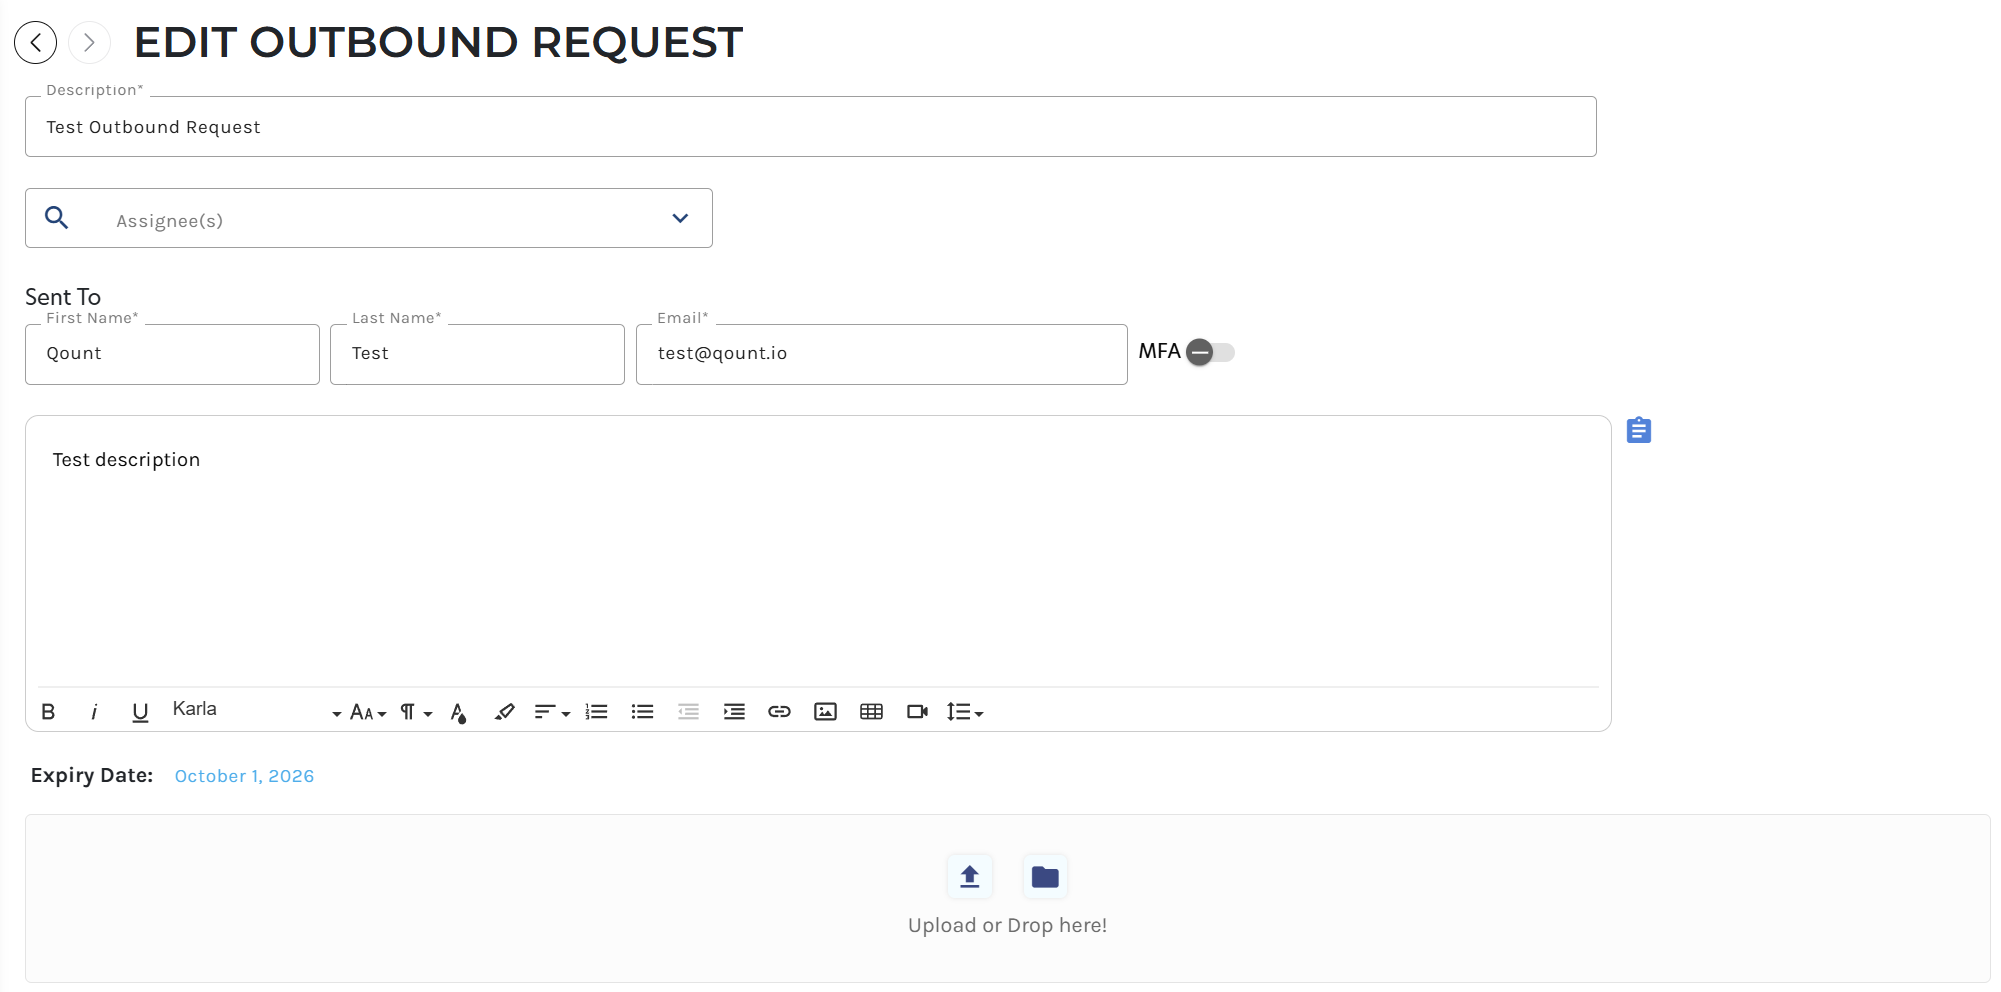
Configure Outbound Details
|
Description |
Enter a description that identifies the purpose of the Outbound communication. Choose a description that allows firm users to easily understand what is being sent. |
|
Client |
Select the client who should receive the Outbound communication. |
|
Assignee(s) |
Select the firm users who should be assigned to the Outbound communication. This helps identify which internal users are responsible for the communication. |
|
Send To |
Configure the recipient information. Enter the applicable:
The secure Outbound Link will be sent to the configured recipient.
|
| Enable MFA |
MFA can be enabled to provide an additional layer of security. When MFA is enabled:
Use MFA when additional recipient verification is required before sensitive information can be accessed. |
| Message |
Provide any extra details or information for the Outbound. You can also select any content template by clicking on the Blue Template Icon.
|
| Expiry Date |
The Expiry Date determines the final date the recipient can access the secure link. After the configured date, the link is no longer valid or accessible.
⇒ Tip: Set an Expiry Date that gives the recipient enough time to access the documents without leaving sensitive information available longer than necessary. |
| Upload Documents |
Upload the files or documents that should be securely delivered to the recipient. These may include:
|
| Email Details |
After completing the Outbound Link information:
The recipient will then receive the email containing their secure Outbound Link. |



Send to Multiple Contacts
Multiple contacts can be added to a single Outbound communication. When more than one contact is included, Qount sends a separate secure link to each contact.
For example, if three contacts are entered:
- Contact 1 receives their own secure link.
- Contact 2 receives a different secure link.
- Contact 3 receives another separate link.
Recipients do not share the same Outbound URL. This helps keep each recipient's secure access, separate.
Managing Outbound Links
Active/Done Status
The Outbound page displays requests in Active or Done status. 
-
Active: The secure link is available and can still be accessed by the recipient.
- Done: The secure link has completed its intended workflow and no longer requires action.
Actions (3-dot menu)
Each outbound request includes additional actions the user can choose from.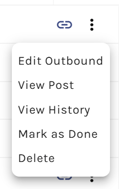
|
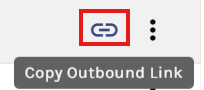
Copy Outbound Link |
Simply click on the Copy Outbound Link icon to quickly and conveniently copy the link for sharing.
|
|
Edit Outbound |
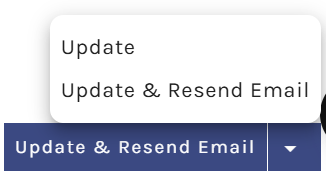
Select Edit Outbound to make any necessary changes to the existing request.
Once all updates have been implemented, there are two options:
|
|
View Post |
Select View Post to open and review the details of the request. From here, you can verify:
|
|
View History |
Select View History to open and review the history of actions for the Outbound. The following details may appear in the History:
|
|
Mark as Done |
Select Mark as Done when the request no longer requires action. This moves the Outbound from Active status to Done. Use this option after:
|
|
Delete |
Select Delete to remove the Outbound. Please note that requests that have been deleted cannot be recovered. |
Common Uses
Use an Outbound Link when your firm needs to securely deliver sensitive information to a client.
Examples may include:
- Confidential reports
- Secure documents
- Protected account information
- Temporary credentials
FAQs
Q1. What is an Outbound Link used for?
Outbound Links are used to securely send documents and information from your firm to a client.
Q2. Can MFA be enabled for an Outbound Link?
Yes. MFA can be enabled so the recipient must enter a verification code before accessing the link. This code will be received via the configured email.
Q3. What does the Expiry Date control?
It determines the final date the recipient can access the secure Outbound Link.
Q4. Do multiple contacts receive the same link?
No. Each contact receives a separate secure link.